Showing posts with label unity3D. Show all posts

Saturday, August 5, 2017

New audio analysis engine 3.0 complete

Version 3.0 of my audio analysis system is finally complete!  This is essentially a complete rebuild of my previous visualization system with additional flexibility added.  Now I can control individual frequency ranges across the audio spectrum.

The previous version had all that stuff hard-coded.  This latest version allows someone to set different frequency ranges for each of the different audio channels.  Some pics of the newest system are below:

A new and improved interface with larger text and more accessible sliders. This new system will also make use of Max/MSP's Mira which allows you to control the interface from a website!  Custom interfaces will be faster to implement versus having to use TouchOSC in previous versions.

Interface for controlling different frequency ranges.  Currently this is set to 32 bands. It can be increased if additional frequency resolution is required.

Simplified and condensed audio compression interface. It looks like a lot of knobs in there but ideally you would only need to set these once and then forget about it afterwards.

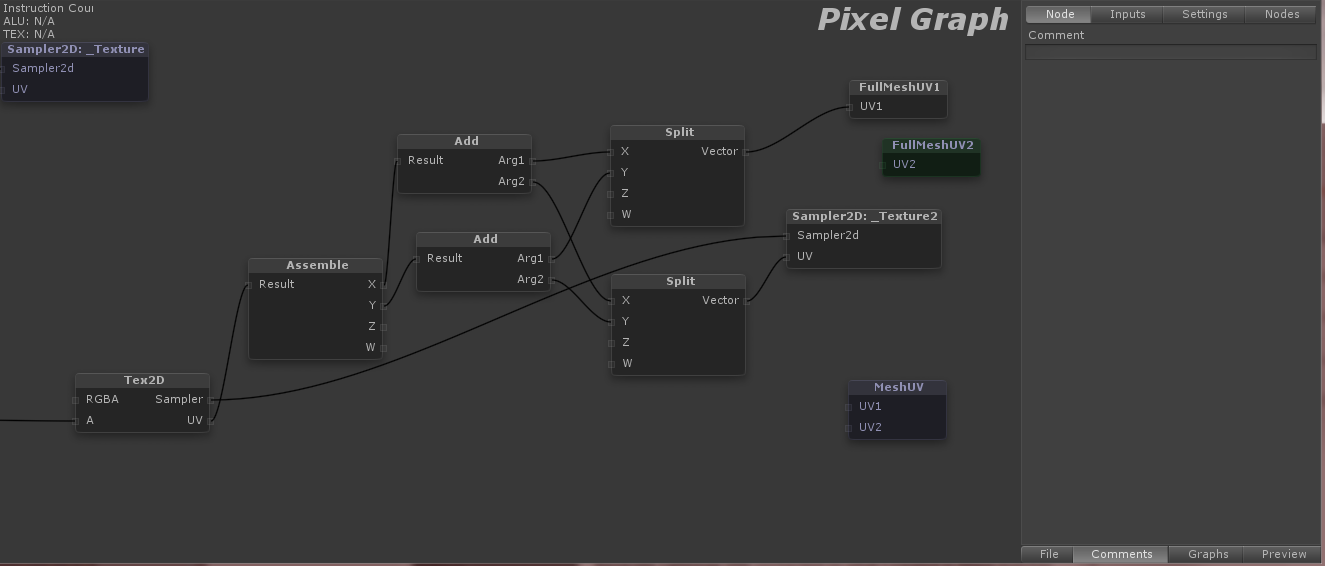
Example of some of the data being extracted from each channel. This gets sent to Unity3D via OSC.

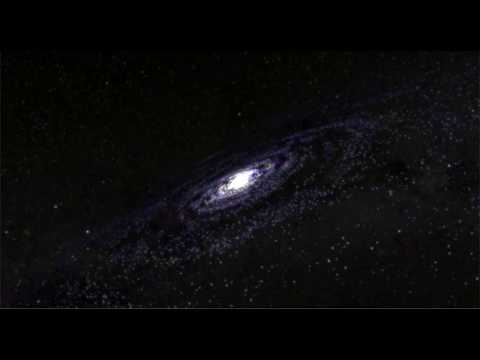
Now that I've wrapped this part up, it's time to move back into seeing how all this plays out in 3D.  More updates will be coming soon with a city reacting to music.

Wednesday, April 1, 2015

Iron Man UI: complete!!!!!


The Iron Man UI inspired visualization is complete!  You can check out the complete video above which is accompanied by my latest single, Renewal, which is available on CDBaby, Amazon, and iTunes!

Now to talk about some of the movement of the visualization through space.  All of the different visual elements are linked to a master node which can move the complete structure through space.  You'll notice this motion occurs for the first time around the 0:30 mark.


I put different dampening ratios on all the different parts so everything moves to a new location but not all at the same time.  This was mainly to create more visual interest in the movement.


You'll notice in the image above I've circled in red the two dials which control how or when a global motion will occur. This is one area I'm looking to explore much further in future visualizations but I'll describe that in just a bit.  For this, a threshold and timer determine when the entire structure moves and both of these variables are determined by audio parameters.  Putting controls in place allows you to override or help make this event happen to some extent. 

The image above shows the controls I've put in place for this visualization.  I've elected to keep them very simple on this one.  Some visualizations I create have very complex controls with lots of presets.  It often depends on the client and the performance as to how much flexibility they would like.  Here is an example of a more complex setup.
Each visual element I create often has numerous components that can be scripted to the UI control in Max/MSP.  I typically create presets which allow you to quickly move through lots of complex settings.  This is very similar to lighting and audio control boards you would find in live performance venues.  Technicians will dial in lighting and sound settings, create cues or presets, and build all of the events during rehearsals.  When the big performance happens, it's a much simpler process of moving through presets or cues at the correct timings.  My system mimics this procedure.  All of these controls/presets can also be further simplified for a mobile interface.  You can sit in the audience and run the entire visualization from your smartphone if you wanted to.

Back to the Iron Man UI controls, I have a hue shifter so you can shift the hue on all of the visuals from red to green or blue.  Bloom intensity lets you control how much bloom is applied.  There is a subtle adjustment on this which reacts to the amplitude of the audio.  This control allows for larger changes with the effect.  Height controls how much up and down motion the entire structure will move.  Setting this to 0 keeps everything at the default height.  Increasing this will expose the entire structure to an audio parameter which moves everything up or down.


As mentioned in previous postings, everything is driven by the audio.  The additional controls just allow for greater motions or an overarching control on some of these audio driven systems.  The computer handles all the minute analysis details and movement while you get to make the broad sweeping changes.

I noted earlier about future explorations in my visualizations and where I'm looking to go next.  Music has lots of patterns, themes, and motifs that often build on each other and develop.  I want to explore these further within the realm of video game combos.  Lots of video games utilize a system of combos.  Typically someone might button mash or go through a sequence of buttons a bunch of times to create a 25 hit combo for example in a fighting game.  RPG's, platformers, and other genres of video games have utilized similar concepts as well. Now what if musical structures could create their own combos within a music visualization system? That exploration could easily take another 2 years and another Master's degree to investigate.  In my next project, I'll at least begin to scratch the surface of combining those principals and we'll see what happens.

This is also my last time working with Unity 3.5.  Going forward, I will be migrating all work to Unity 5.0.  Stay tuned for the next visualization.  I also have some small tangential explorations from this visualization I'll post about too!  Can't wait to share my next developments.  For now, I hope you enjoyed this one.


Sunday, March 22, 2015

Iron Man UI: Almost there.... plus a new song called "Renewal"

It's been a couple weeks since I last posted anything about this project.  It's almost done.  I have a bunch of additions.  Last time I mentioned the need for one big unifying piece to help tie all the separate elements.  Here is a quick image of what that looks like:
This consists of a bulls eye element in the middle which can rotate independently from the rest of the parts.  Since there is so much other movement going on in the visualization, I elected to keep this element completely static.  To represent the music, it has a texture ring which emanates outwards exposing parts of the complete design.   The tutorial in my previous post demonstrates how to do this effect.

Finally, I added a few arcs that rise and sink around the central column.

There are a few more finishing touches like showing how this whole thing moves through space which I'll get to in my next post.

I got a bit side tracked because I had to compose a new piece of music for this animation. The piece of music is all finished and should go live later this week.  For now, you can check out a snippet of it in this video.  It's called "Renewal"


Much more awesomeness to come so stay tuned....

Thursday, March 12, 2015

Creating a 2 UV set shader in Unity

Doing a quick deviation from my documentation on the Iron Man music visualization.  Figured I'd put up a quick tutorial on creating a shader that utilizes two UV sets on a mesh.  I had trouble finding a good example of this on the web.  Feel free to post in the comments if there is a good one someone knows about that I might have missed.  The software I'm using for the following tutorial is Unity 3, (pro or free version) Autodesk Maya (any version), and the Strumpy shader editor for Unity. 

This should work without any issue in Unity 4 and Unity 5.  Once I complete this project, I'll re-explore this in Unity 5 to confirm.  Anyone is welcome to comment as well to confirm this works in 5.

1. Create a sphere in Maya


In the options box, make sure Sawtooth at poles is selected for texture mapping
This will create a UV layout as shown in the UV texture editor to the right of the image.

2. Create a secondary UV set.  


For this step, I used a planar projection on the y-axis.  Make sure you have Create new UV Set checked and designate a new name

3.  Import the new asset into Unity


I've included a screen shot of my settings.  Typically Unity uses the second UV set for light mapping purposes.  I have Swap UVs and Generate Lightmap UVs unchecked so what I created in Maya matches what gets imported to Unity

4. Strumpy shader graph setup


You'll want to use the FullMeshUV1 and 2 or the MeshUV nodes to access the two UV channels

I then use a Sampler2D to get the texture and its UVs. Now the next part is optional; If you want the texture channel controls that show up in the inspector to be operational, then we will need to combine the UVs from the texture and the mesh


Use split to breakdown the UV vector into it's X and Y channels.  Use the add to combine the texture UV channel and the mesh UV channel. Next, assemble merges these X/Y channels back into one vector.  Finally, you can attach that to a Tex2D node and use the RGBA from there.

In my example, I use the alpha channel from the second UV texture and UV mesh to mask out parts of the first UV layout.  Since my object is a sphere, the Y-axis projection on UV channel one serves as the base design while the second UV channel which was mapped out in a sawtooth pattern, allows you to use a simple gradient to mask out a ring-shaped section of the original texture.  Even better, you can now use the offset y on the second channel to animate the gradient up/down exposing different parts of the base texture!  Examples below.


Original texture with the Y-axis projection on UV channel 1


Second texture on UV channel 2.  This is actually just a straight horizontal gradient.


The combined effect of the two.  Now you can animate a ring emanating outwards or inwards with only one simple number: 2nd texture's y offset.


Live Music Visuals: Galaxy v2.0 - Burning Bridges

Still working through Unity2019 and all the preview packages.  Trying to get some cool space stuff that reacts to music.  Second attempt h...